Have you ever wondered about how to screenshot on Surface?
You see, Microsoft Surface is basically a tablet made by Microsoft. So as you might expect from a tablet, it has a simpler mechanism than a desktop. Although it is a tablet, it uses Windows as its OS, with the exception of Surface Duo, which uses Android.
Since the OS is basically the same, the methods of taking screenshots should be similar as well. So, to answer your curiosity, here are the best methods to take screenshots on Microsoft Surface.
Table of Contents
Part One: How to Screenshot on Microsoft Surface Pro Series Without a Type Cover
Then, how to screenshot on Surface laptop? The first method we’ll explain is basically the essentials, the things that can be done even without using the type cover. For this first part, we have four different methods that you can try.
1: Use "Power Button + Volume Up" Button
The first trick you can do is to use the Power Button and Volume buttons altogether. By pressing these two buttons, you can take a screenshot of your screen. These buttons are located on the top part of the device.

And remember, this method only works on Surface Pro 4 and later devices, so if you are supposed to have older tablets, please refer to the other tricks. After you press the two buttons simultaneously, the screen will dim for a bit, and the screenshot will be taken. You can find the result inside the Image folder on your device. If you couldn’t find it somehow, check the Screenshots folder.
2: Use Surface Pen
Most Surface tablets have one special thing called Surface Pen. This pen is highly functional. You can use it to add something to your documents or draw something in the image editor, or you can also utilize some of its features to take some screenshots.
If you have an older version of Windows, we highly recommend you update to at least Windows 10 to gain the full potential of this tool. If you do have Windows 10 installed, then you may use a feature called Screen Sketch.
When activated, this feature will capture the screen and save it as a picture. To do so, you can click the eraser button twice, which is usually located around the top side of the pen.
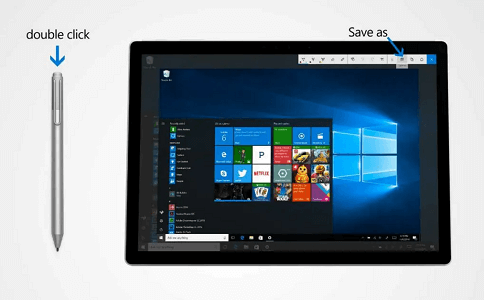
The screenshot can be edited further in the image editing software, and once you're satisfied with the result, select Save As to save it locally.
3: Use the Windows Snipping Tool
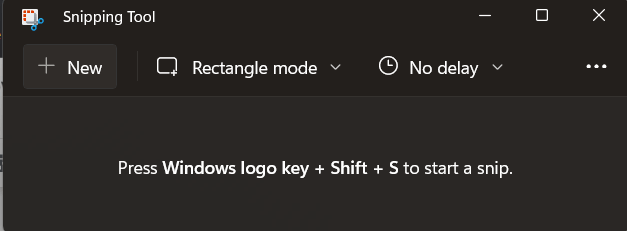
The next tool you can use is the Snipping tool. If you're wondering how to screenshot on windows surface, it's one of the best solutions you can try. Generally, Snipping Tool is already available on Windows-based devices, including Surface laptops and tables.
You see, you don't need to install any additional app in order for it to work. Snipping Tool can be opened directly from the Start Menu, like this:
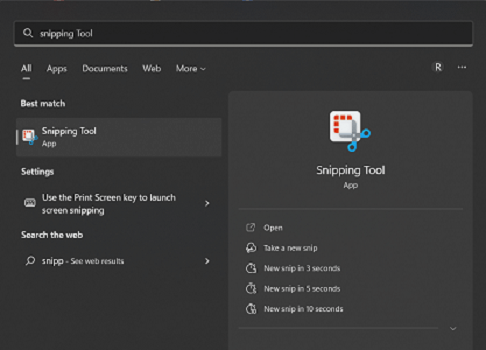
Now that the tool has been opened click New and then adjust the rectangle to capture what’s going on on the screen. To save the image, click Save or use Ctrl + S keys.
4: Use Windows Snip and Sketch Tool
If you somehow can’t find the Snipping Tool, you may use the alternative. It’s Snip and Sketch Tool, which functions exactly the same as the Snipping Tool. This tool is available on older Windows versions. Since both the tools work in the same way, the operation is basically as easy.
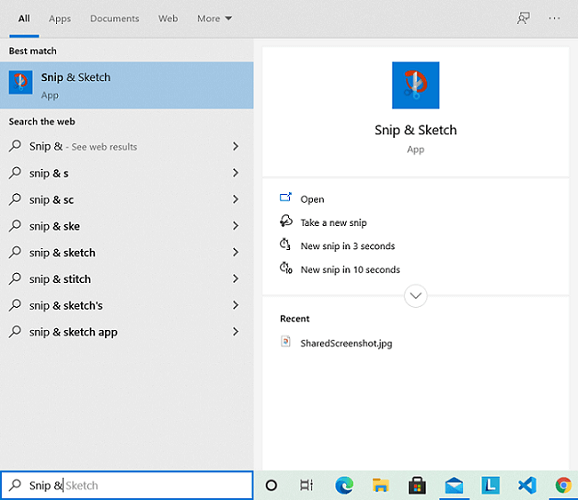
To capture the screen, you can open the app first. Search for it in the Start Menu. And then, select New and adjust the rectangle to capture the specific part of your screen. Select Save to save the picture to your desired folder.
Part Two: How to Screenshot on Microsoft Surface Laptop Series
Now, how about laptop? Since laptops and desktops basically use the same system, you may find so many similar methods of taking screenshots. Without further ado, let’s go to the first method, using Print Screen.
1: Press the "Print Screen" Keys
The first method is actually very basic. If you have the Type Cover attached, you can use the traditional method of screen capturing using the Print Screen button.
As usual, find the button first.
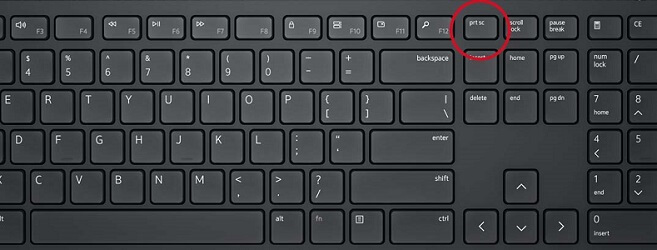
And then paste it into an image editor, for example, Paint. Finally, configure the image as you wish and save it to the desired folder.
2: Press the "Ctrl + Print Screen" Keys
If you're wondering how to take a screenshot on Microsoft surface, one of many possible answers would be Ctrl + PrintScreen buttons. It works in a similar way to the first method above, but it can be an alternative if there's nothing happening after you press the Print Screen button.
What you need to do is to press the buttons first and then paste them into Paint. After you finish, click Save to store the image in your laptop's storage.
3: Press the "Windows + Print Screen" Keys
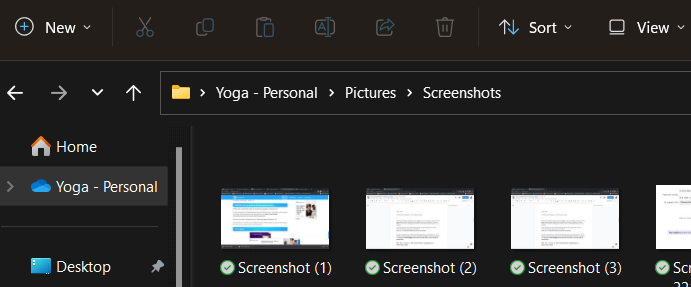
The next method you can try is pressing the Windows and Print Screen keys altogether. By doing so, you'll be capturing a specific part of your screen. It can be a great way to capture something that's small and unnoticeable.
All you have to do is hit those keys together, and the picture will be saved inside the Picture/Screenshots folder.
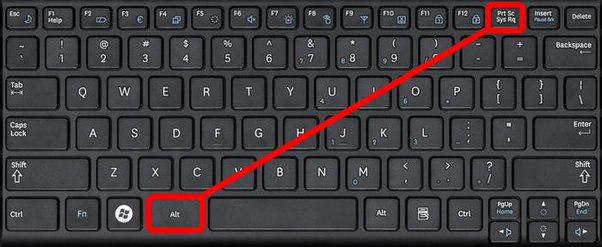
4: Press the "Alt + Print Screen" Keys
The next method is recommendable if you're using Surface Pro 4 and above. The trick is also usable if you attach the cover. To capture the images, you can hit the Alt and Print Screen buttons simultaneously.
And then, open Paint or other image editors you have installed and paste the image there. Click Save to store the image in the desired folder, or further edit the images by adding some elements you wish.
5: Press the "Windows + G" Keys
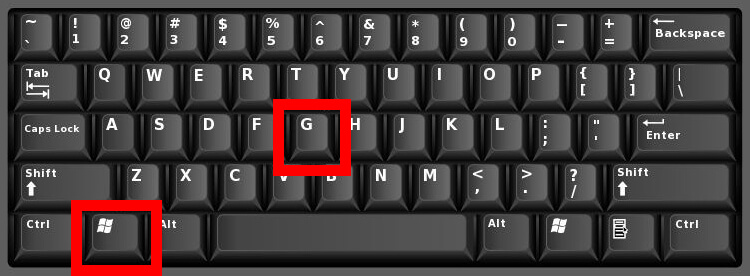
Last but not least, you can also try Window's default footage-capturing tool. To open it, simply click Windows + G.
A new Game Bar window will open, and there you can find several buttons to capture any images or videos. To start capturing, simply click the Capture button. The captured footage will be saved under the Pictures and Videos folder, depending on what kind of file you saved.
Part Three: How to Screenshot on Microsoft Surface with Third-party Screenshot Apps
If you're looking for another solution to answer how to take screenshot on Microsoft Surface, third-party apps can also be the answer. Here is the most recommended one:
MoniVisor for Win
The best app to take a screenshot on desktop computer remotely is MoniVisor for Win.This app is best apps for it allows you to take screenshots on others' computers without them knowing and check what they are doing on the computer. If you are looking for an app, which can do screenshot on a desktop computer remotely and secretly, we greatly recommend this app for you! And, it has won uncountable phrases from thousands of users.

The screenshots taken by MoniVisor for Win is automatically. As for the intervals, it totally depends on your own requirements. If you want, you can take automatic screenshots every five minutes with breaks of fifteen seconds.
Conclusion:
And that's all we can share about the simple methods to screen capture on Microsoft Surface. Fortunately, since most Surface devices use Windows as their OS, the way of capturing images and videos is generally the same as desktop. So, follow each step carefully and pick whichever method that works best for you.
By Tata Davis
An excellent content writer who is professional in software and app technology and skilled in blogging on internet for more than 5 years.
Thank you for your feedback!


