FamiGuard Support: Monitor Devices with Others' Permission.
Have you ever been in a situation where you need to save an important piece of information displayed on your screen, but don't know how? No problem!
Taking a screenshot on your Dell laptop or desktop can help. This will allow you to capture what you're seeing on your screen and save it as an image file to use later or share.
In this article, we will provide you with a step-by-step guide on how to take a screenshot on a Dell device using various methods.
Table of Contents
Part 1. How to Screenshot on Dell
Screenshots on your Dell device can be taken in a number of ways, and we've highlighted some of the easiest ones for you to try. Here they are:
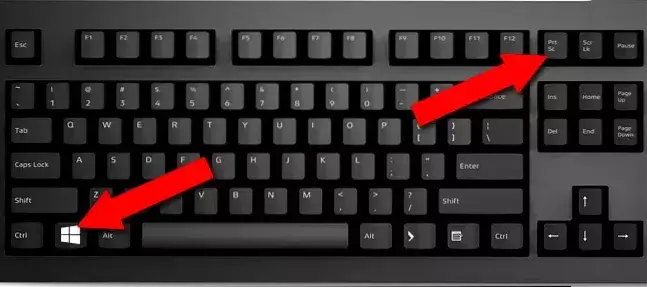
1. Windows Key + Print Screen Key
Step 1: Press the Windows key (⊞) and the Print Screen key (PrtScr).
Step 2: The screen will briefly flash, indicating that you've taken a screenshot.
Step 3: Go to This PC > Pictures > Screenshots to view the captured screenshot.
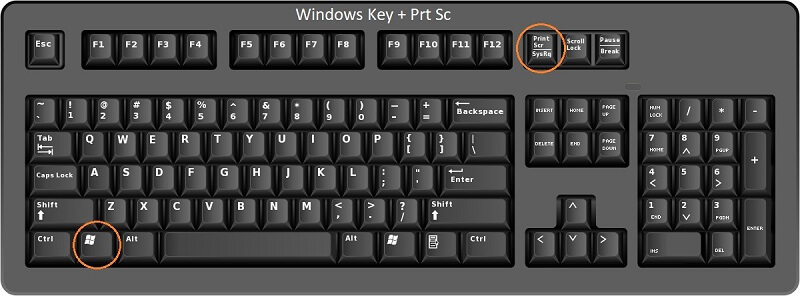
2. Alt Key + The Print Screen Key
Step 1: Press the Alt key and then the Print Screen key (PrtScr).
Step 2: The captured screenshot will be copied to your clipboard.
Step 3: Paste the screenshot into Microsoft Paint to save it.
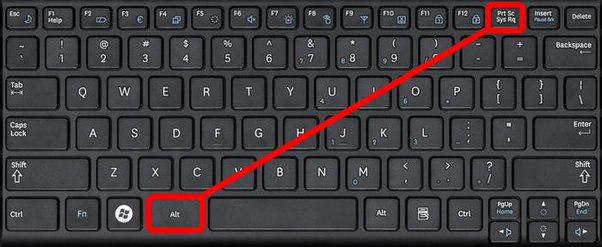
3. Fn key + Windows key + Space Bar
Step 1: Press the Fn key, the Windows key (⊞), and the Space bar together.
Step 2: The screen will briefly flash once the screenshot has been captured.
Step 3: You can view the screenshot from This PC > Pictures > Screenshots.
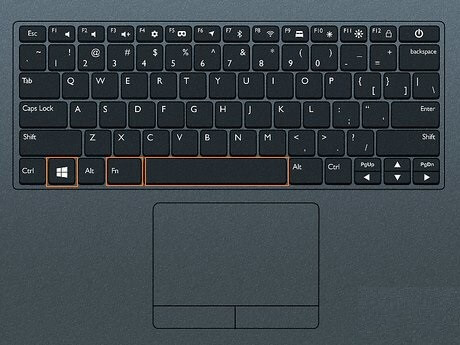
4. Game Bar
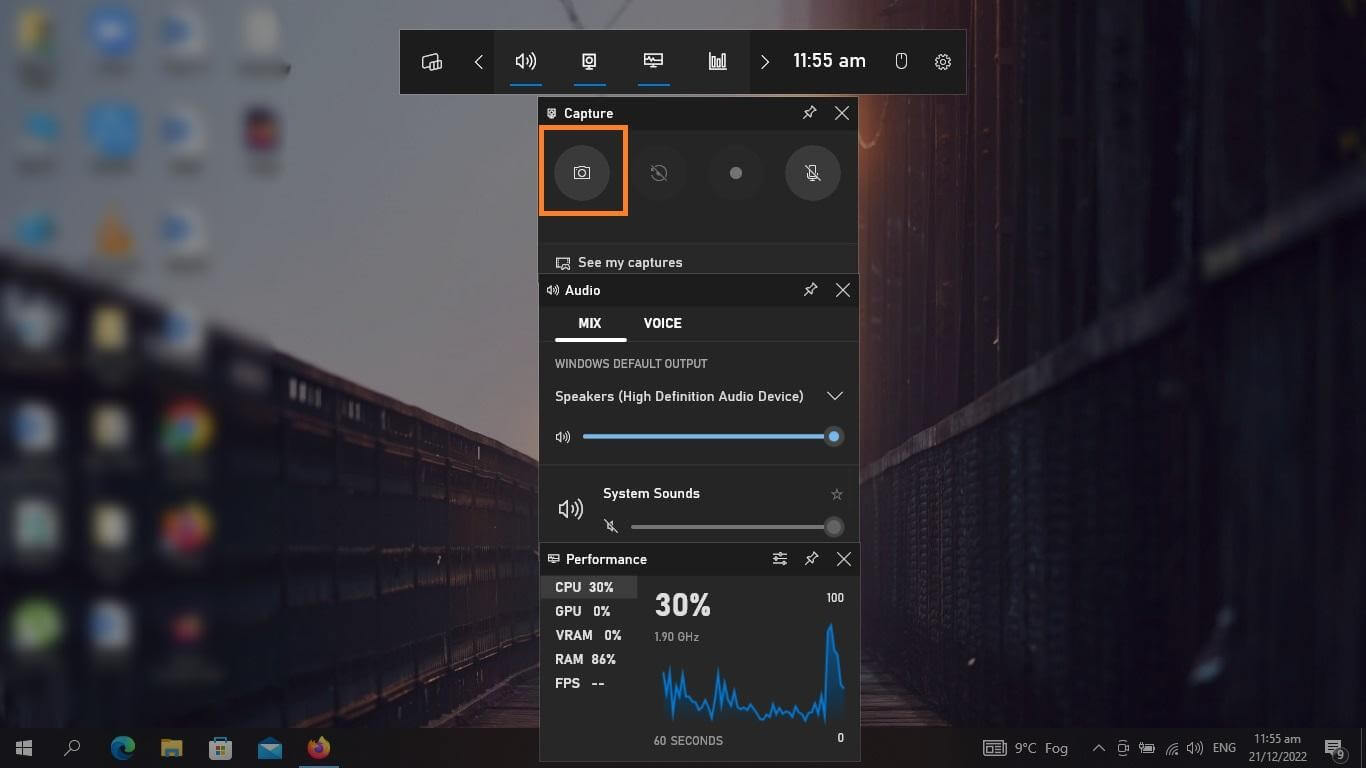
Step 1: Navigate to Settings > Gaming and check that the Game Bar is enabled.
Step 2: On your keyboard, press the Windows key (⊞) and the G key together.
Step 3: Click the screenshot icon in the game bar to capture the active window.
5. Snip & Sketch
Step 1: Use the shortcut Windows key + Shift + S, or search for it in the start menu.
Step 2: A toolbar will popup at the top of the screen. Choose which type of screenshot you want.
Step 3: After you take a screenshot, a notification with a preview will pop up. Click on it to edit and save the image as you like.

Part 2. How to Screen on Other's Dell Computer Without Them Knowing
Trying to take a screenshot on someone else's Dell computer without their knowledge can seem like an impossible task, but the MoniVisor for Windows tool can help.
MoniVisor for Windows
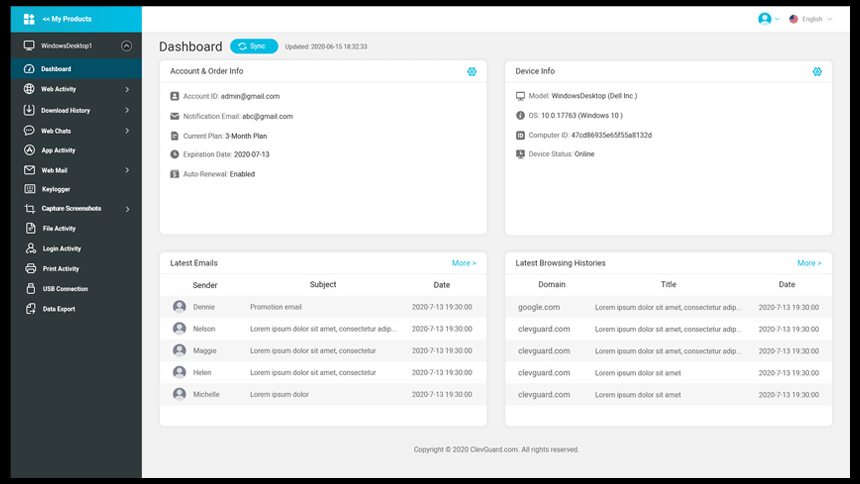
MoniVisor is a monitoring software for Windows that you can use to monitor a Dell computer without being detected. One of the key features of MoniVisor is its ability to take periodic screenshots of the target computer and sync them to your dashboard in within a period of time. You can then download or delete the screenshots as needed with this tool.
In addition to Dell, it available for Windows 11/10/8.1/8/7 including HP, Acer, Sumsang and Lenovo etc.
How to Use MoniVisor to Take a Screen on Other's Dell Computer Secretly
Here is a simple guide to help you start using MoniVisor for Windows and take screenshots on other's Dell computer :
Step 1: Create a MoniVisor account and select the appropriate plan to activate all features.
Step 2: Install & setup the tool on the target's computer. Download it from "www.installfree.net".
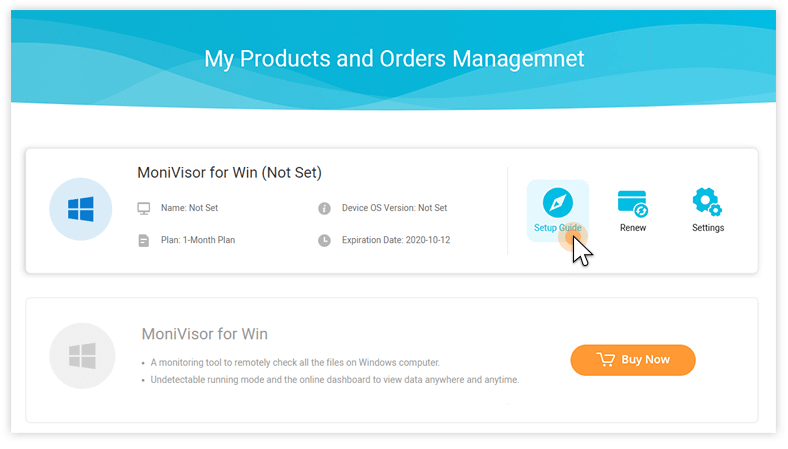
Step 3: Once you're finished, log back into your MoniVisor dashboard to see all the recorded data.
Conclusion
The question "How do I take a screenshot on my Dell computer?" is still a common one among many Dell users. If you are one of those users, we hope that this guide has helped you to find the best method for capturing screenshots on your Dell device.
To capture the screenshots on someone else's Dell computer, we suggest using MoniVisor for Windows. This tool has advanced screen capturing capabilities and allows you to monitor any Windows computer from your own device without being detected.
By Tata Davis
An excellent content writer who is professional in software and app technology and skilled in blogging on internet for more than 5 years.


